If you have ever noticed your energy bills climbing season after season, felt drafts in rooms that should be comfortable, or wondered why some rooms in your home stay hot while others stay cold, the culprit often comes down to one thing: your insulation. Or more precisely, the lack of a proper air seal combined with effective insulation. That is exactly where residential spray foam insulation changes the conversation in a way few other building materials can.
Spray foam insulation is not just another layer of material stuffed between your wall studs or blown across your attic floor. It is a two-in-one product that insulates and air-seals simultaneously, expanding into every crack, gap, and void in your home’s building envelope. When applied correctly, it creates a continuous thermal and air barrier that traditional insulation types simply cannot match on their own. For homeowners looking to improve comfort, lower energy costs, and protect their home from moisture damage, spray foam has become one of the most effective options available.
This guide brings together years of our firsthand experience working with residential spray foam across a wide range of home types and climates. We built it to be the single resource you need, whether you are planning a new build, retrofitting an older home, or trying to decide if spray foam is worth the investment for your specific situation.
What Is Spray Foam Insulation and How Does It Work?
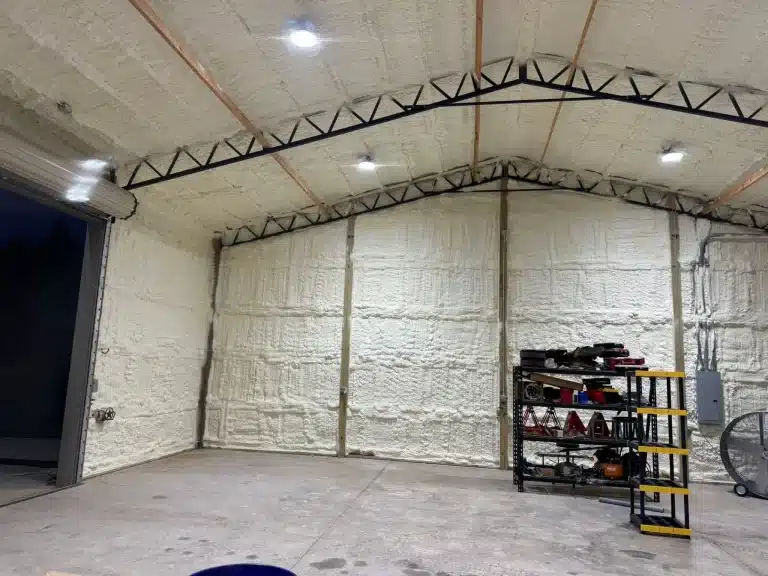
Spray polyurethane foam (SPF) insulation is a chemical product that is mixed on-site and sprayed as a liquid into wall cavities, across attic surfaces, around rim joists, and into other areas of a home’s building envelope. Within seconds of application, the liquid expands and cures into a solid foam that fills gaps, seals cracks, and adheres to the surfaces around it.
The chemistry behind spray foam involves two main components. The “A-side” contains isocyanates, and the “B-side” contains a polyol blend along with blowing agents, flame retardants, and other additives. When these two components meet at the spray gun, they react to form polyurethane foam. This reaction generates heat and causes the foam to expand, typically reaching 30 to 60 times its original liquid volume.
What makes spray foam fundamentally different from other insulation types is that it performs multiple control layer functions at once. According to the Building Science Corporation’s Residential Spray Foam Guide, spray foam has the unique ability to handle water control, air control, vapor control, and thermal control, making it one of the most versatile insulation materials available for residential construction.
For more detailed technical information on these control layers and climate-specific recommendations, see the Building Science Corporation – GM-2102: Residential Spray Foam Guide.
The Four Control Layers
Your home’s building envelope needs to manage four things to keep you comfortable and protected:
- Water control: Keeps liquid water out of your wall and roof assemblies
- Air control: Stops uncontrolled air leakage through gaps, cracks, and penetrations
- Vapor control: Manages moisture vapor diffusion to prevent condensation inside wall and roof cavities
- Thermal control: Resists heat flow to maintain consistent indoor temperatures
Traditional insulation like fiberglass or cellulose handles thermal control reasonably well but does very little for air control. Spray foam, by contrast, provides continuity across all four layers when installed correctly. This is why it can have such a dramatic impact on both energy efficiency and indoor comfort.
Open-Cell vs. Closed-Cell Spray Foam: A Detailed Comparison
Not all spray foam is the same. The two primary types used in residential applications, open-cell and closed-cell, differ significantly in density, R-value, moisture resistance, and best-use cases. Choosing the right one depends on your climate, the area of the home being insulated, and what you need the foam to accomplish.
Open-Cell Spray Foam
Open-cell spray foam is a low-density material. During expansion, the tiny bubbles (cells) within the foam rupture, leaving a porous, sponge-like structure. This makes open-cell foam lightweight, flexible, and relatively inexpensive compared to closed-cell. It typically delivers an R-value of approximately 3.5 to 3.8 per inch.
The porous structure allows water vapor to pass through the material, which means it breathes. This can be an advantage in certain wall assemblies where you want vapor to dry in one direction. However, that same porosity means open-cell foam does not serve as a vapor barrier or a meaningful water barrier. It also provides essentially no structural reinforcement to the assembly.
Closed-Cell Spray Foam
Closed-cell spray foam is a medium to high-density material where the cells remain intact during expansion, trapping an insulating gas (the blowing agent) within them. This gives closed-cell foam a much higher R-value, typically around 6.0 to 7.0 per inch, and roughly twice the R-value of open-cell at the same thickness.
The intact cell structure makes closed-cell foam essentially impermeable to both air and moisture vapor. At thicknesses greater than 1.5 inches, high-density closed-cell spray foam qualifies as a Class II vapor retarder under the International Residential Code. It also adds structural rigidity to the assembly it is applied to, which can improve the resistance of walls and roof decks to wind loads.
Comparison Table
| Feature | Open-Cell Spray Foam | Closed-Cell Spray Foam |
|---|---|---|
| Density | Low (0.5 to 1.0 lb/ft³) | Medium to High (1.5 to 2.5+ lb/ft³) |
| R-Value per Inch | ~3.5 to 3.8 | ~6.0 to 7.0 |
| Air Barrier | Yes | Yes |
| Vapor Barrier | No (vapor permeable) | Yes (at 1.5 inches or greater) |
| Water Resistance | Low (absorbs water) | High (resists water penetration) |
| Structural Support | None | Adds rigidity and strength |
| Expansion | High (fills large cavities) | Moderate |
| Cost | Lower per R-value | Higher per R-value |
| Best Applications | Interior walls, sound control, large cavities | crawlspaces, foundations, below-grade, cold climates |
Key Takeaways: Open-Cell vs. Closed-Cell
- Open-cell is the better choice for interior wall cavities in mixed or warm climates where vapor permeability is desirable, and cost is a consideration.
- Closed-cell is the clear choice for below-grade applications, crawlspaces, basement walls, and any area where moisture resistance and vapor control are priorities.
- In cold climates (IECC Zones 5 and above), closed-cell spray foam is strongly recommended for walls and roofs due to its condensation control capabilities.
Expert Tip: If you are insulating a crawlspace or basement, do not cut corners with open-cell foam. The moisture resistance of closed-cell foam is essential in below-grade and high-humidity environments. The Building Science Corporation’s guide specifically recommends only high-density closed-cell spray foam for vented crawlspaces and for spray foam applied directly to concrete foundation walls in Climate Zones 5 and above.
Where Spray Foam Goes in Your Home: Application Areas
Understanding where spray foam belongs in your home is just as important as choosing the right type. Different areas of the building envelope have different requirements for thermal resistance, moisture control, and air sealing.
Attics
Attics are one of the most common and impactful places to install spray foam. There are two primary approaches:
Unvented conditioned attics involve spraying foam directly to the underside of the roof deck. This brings the attic into the conditioned space of the home, which is especially useful when HVAC ductwork and mechanical systems are located in the attic. Both open-cell and closed-cell foam work in most climates for this application. In IECC Climate Zones 5 and higher, only closed-cell spray foam should be used directly on the roof deck.
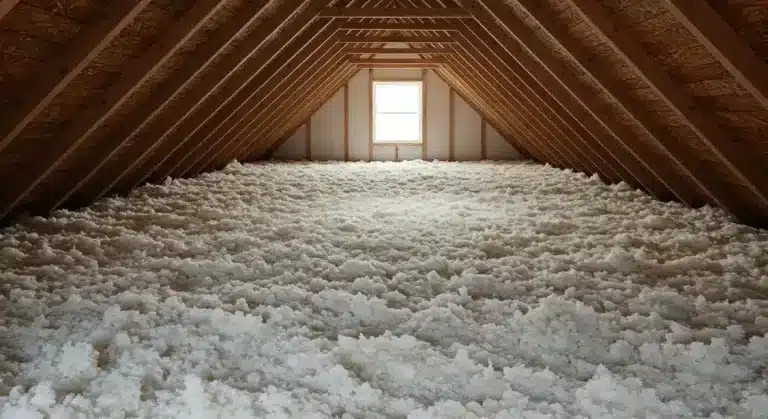
Vented unconditioned attics use spray foam at the ceiling plane to create an airtight seal, which is then filled with fiberglass, cellulose, or other insulation. The spray foam creates what building scientists call an “airtight bathtub” at the ceiling level, preventing conditioned air from escaping into the attic. This approach is more common in cold climates where basements house the mechanical systems.
Key Takeaways: Attic Applications
- If your HVAC equipment and ductwork live in the attic, an unvented conditioned attic with spray foam on the roof deck can eliminate a major source of energy waste.
- For vented attics, spray foam at the ceiling plane prevents air leakage that would bypass traditional attic insulation entirely.
- Wherever unvented conditioned attics are constructed, a means of moisture removal through ventilation is necessary to prevent humidity buildup.
Walls
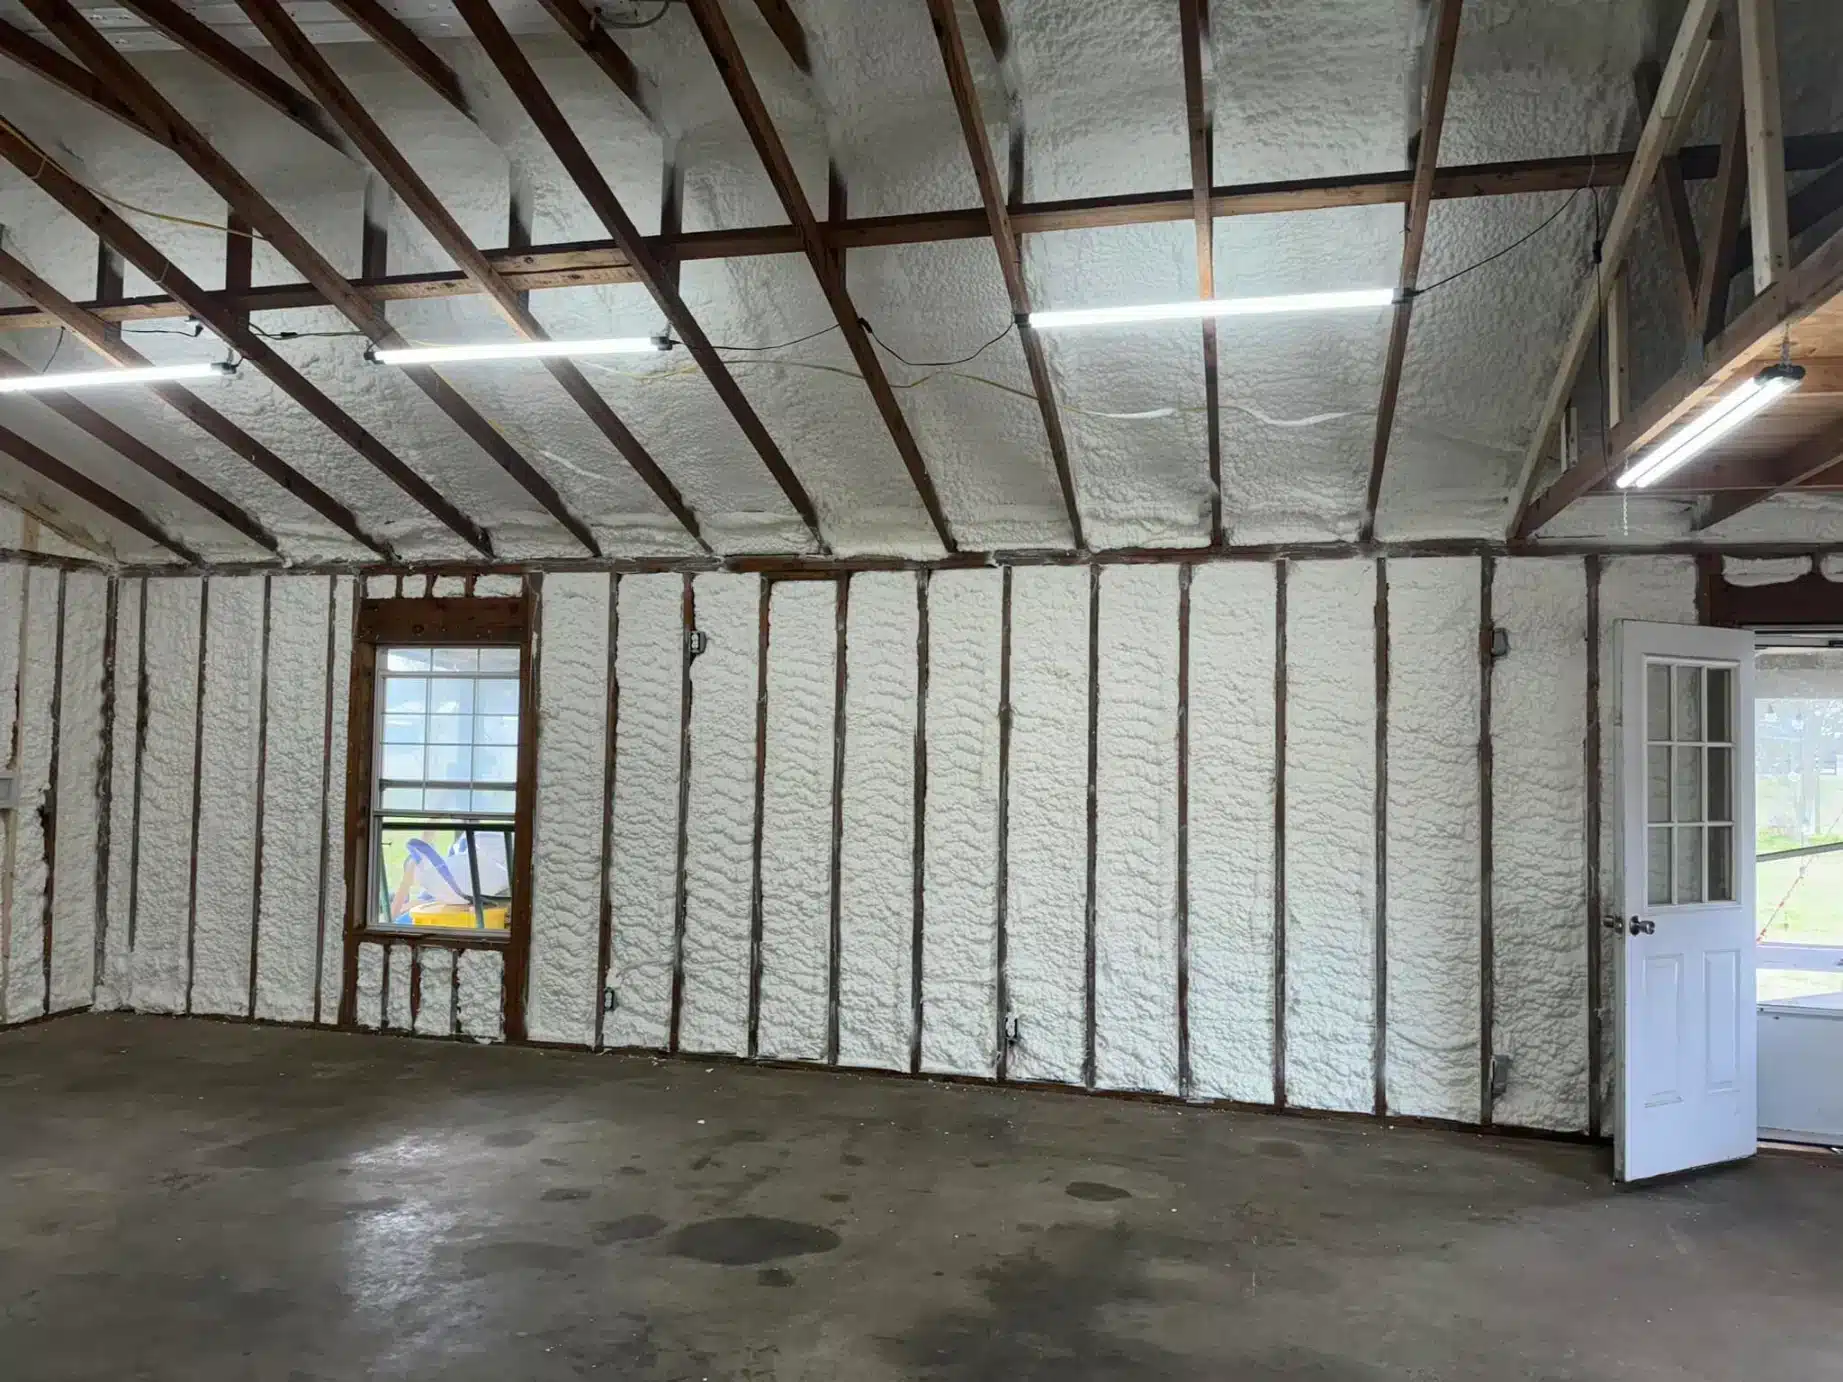
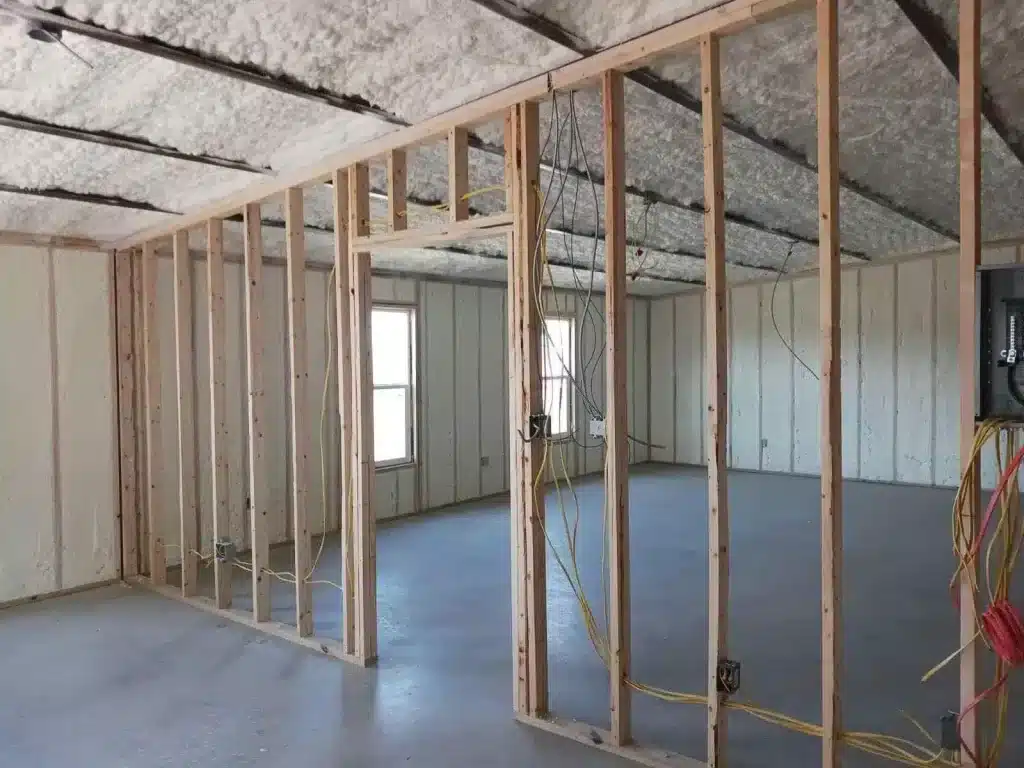
In wall cavities, spray foam fills around wires, pipes, electrical boxes, and other obstructions that would leave gaps with batt insulation. This eliminates the voids and compression issues that reduce the effectiveness of fiberglass or cellulose in real-world installations.
Hybrid wall assemblies are increasingly common, where a layer of closed-cell spray foam is applied directly to the interior surface of the exterior sheathing, followed by fiberglass or cellulose in the remaining cavity space. This approach uses the spray foam primarily as an air and vapor control layer while the less expensive cavity insulation handles the bulk of the thermal resistance.
Basements and Foundations
Basement foundation walls are best insulated on the interior, and spray foam can be applied directly to the concrete. In cold climates, high-density closed-cell spray foam is recommended because of its condensation control properties and its ability to serve as a Class II vapor retarder.
Under basement floor slabs, only high-density closed-cell spray foam should be used, and it must be installed over a granular capillary break. Open-cell foam should never be used under slabs.
Crawlspaces
Crawlspaces present two approaches: vented or conditioned. For vented crawlspaces, only high-density closed-cell spray foam should be used on the floor framing above the crawlspace in all climate zones. A protective board, such as fiber cement, should be installed over the foam to prevent pests from damaging it.
Conditioned crawlspaces are treated as “mini basements” connected to the conditioned space of the house. Spray foam is applied to the crawlspace walls, and the space is supplied with conditioned air or dehumidification to maintain proper humidity levels.
Expert Tip: If your crawlspace has a dirt floor, always pair spray foam insulation with a durable polyethylene vapor retarder covering the ground. Without ground moisture control, even the best insulation will face moisture challenges from below.
Spray Foam vs. Traditional Insulation Types
Spray foam is not always the only answer. Understanding how it compares to other common insulation materials helps you make informed decisions about where it makes sense to invest in spray foam and where other materials might be equally effective at a lower cost.
Comparison Table: Insulation Types
| Feature | Spray Foam | Fiberglass Batts | Cellulose (Blown-In) | Rigid Foam Board |
|---|---|---|---|---|
| R-Value per Inch | 3.5 to 7.0 (varies by type) | 2.9 to 3.8 | 3.1 to 3.8 | 3.8 to 6.5 |
| Air Sealing | Excellent (inherent) | Poor | Poor | Moderate (taped joints) |
| Moisture Resistance | High (closed-cell) | Low | Low | Varies by type |
| Fills Gaps/Voids | Yes (expands into all spaces) | No (must be cut to fit) | Moderate (conforms somewhat) | No (cut to fit) |
| Installation | Professional only | DIY or professional | Professional (blown-in) | DIY or professional |
| Settling Over Time | None | None (but can sag) | Can settle | None |
| Sound Dampening | Good (especially open-cell) | Fair | Good | Fair |
The most important distinction is that spray foam combines insulation and air sealing into a single step. With fiberglass or cellulose, you would need a separate air-sealing process using caulk, foam sealant, and other materials to achieve comparable airtightness. In practice, this separate air sealing is often incomplete, which is why spray foam homes tend to outperform traditionally insulated homes in real-world energy use.
The U.S. Department of Energy’s Guide to Home Insulation notes that inadequate insulation and air leakage are leading causes of energy waste in most American homes, and that heating and cooling account for 50 to 70% of the energy used in the average home.
Expert Tip: For many homes, the highest-impact approach is to use spray foam strategically in areas where air leakage is hardest to control by other means, such as rim joists, crawlspaces, cantilevered floors, and complex framing areas. You can then use cost-effective fiberglass or cellulose in straightforward wall cavities and attics where air sealing is easier to achieve separately.
The U.S. Department of Energy – Guide to Home Insulation provides additional context on how these materials compare and the energy savings potential of proper air sealing.
The Installation Process: What to Expect
Understanding the spray foam installation process helps you prepare your home, know what to look for during the job, and ensure the work is done correctly. Spray foam insulation is not a DIY project. It requires professional equipment, training, and strict adherence to safety protocols.
Before Installation
Proper preparation is essential. The area to be insulated must be clean, dry, and free of debris. Any existing insulation that is damaged, moldy, or wet should be removed before spray foam is applied. Electrical wiring, plumbing, and HVAC components should be accessible and positioned correctly before foam is sprayed over or around them.
Temperature and humidity conditions matter. According to the EPA’s guidance on spray polyurethane foam, temperature and humidity play a critical role in how spray foam cures. Substrate temperatures that are too cold, or ambient conditions that are too humid, can affect the quality of the cure and the long-term performance of the foam.
During Installation
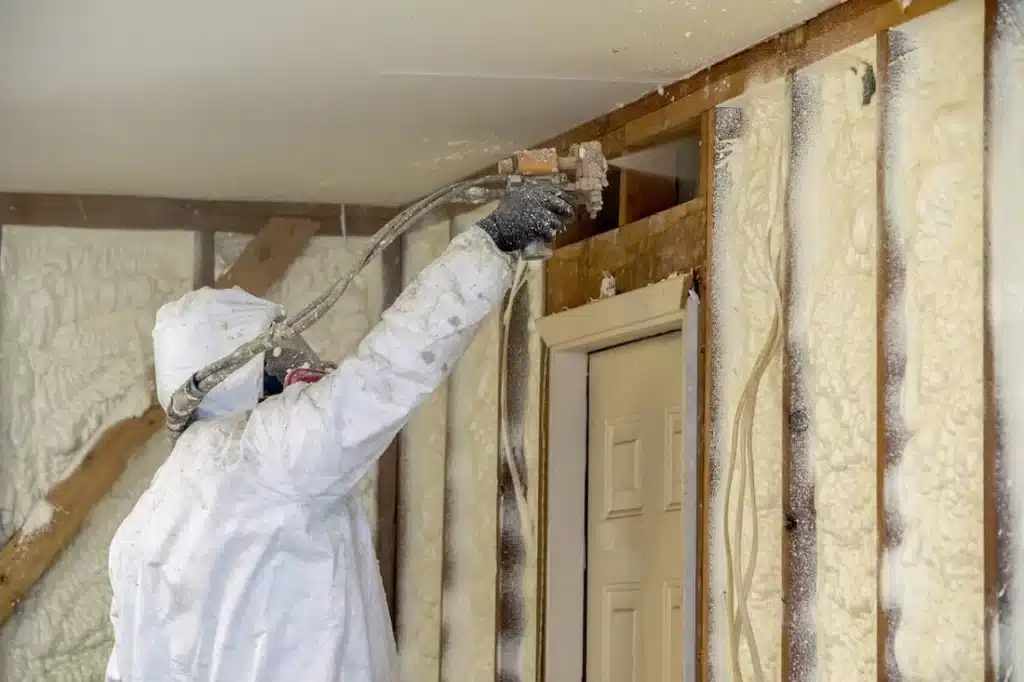
The installation crew arrives with a truck or trailer containing the spray foam equipment, which includes heated hoses, proportioning pumps, and spray guns. The two chemical components are kept at specific temperatures and metered through the hoses at precise ratios. The technician sprays the foam in passes, building up to the target thickness specified for the application and climate zone.
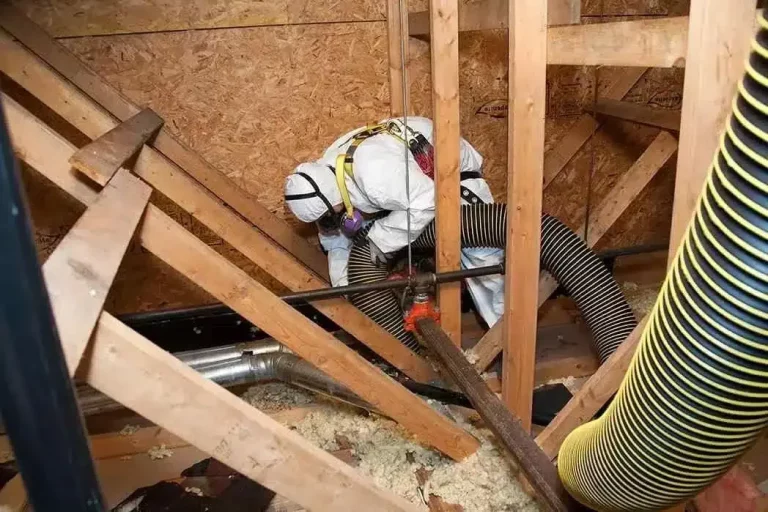
Our crew members wear full personal protective equipment during application, including respirators, protective suits, gloves, and eye protection. This is not optional. The EPA notes that research data indicate inhalation exposures during SPF insulation will typically exceed OSHA occupational exposure limits and require skin, eye, and respiratory protection.
After Installation
Once spraying is complete, the foam begins curing. It may appear solid within minutes, but the chemical reaction continues for hours. The curing time varies depending on the type of foam, thickness, temperature, humidity, and product formulation. Some manufacturers recommend 24 hours for re-entry without PPE and re-occupancy by residents, though curing rates can vary significantly.
Homeowners and occupants must stay out of the home during installation and for the full recommended re-occupancy period. Vapors and aerosols generated during spraying can migrate through the building if the area is not properly isolated and ventilated.
Expert Tip: Ask your installer for the specific re-occupancy time recommended by the product manufacturer for your project. Do not re-enter the home until that time has passed and the area has been thoroughly ventilated. If you have any concern about indoor air quality after re-occupancy, consider hiring an independent indoor air quality consultant to test the air before moving back in.
Safety Considerations and Indoor Air Quality
Spray foam insulation has received significant attention from federal agencies regarding health and safety, and for good reason. The chemicals involved are serious, and both installation quality and occupant safety depend on proper handling, curing, and ventilation.
The EPA – Potential Chemical Exposures From Spray Polyurethane Foam provides official guidance on chemical exposure routes, curing times, and safety considerations for occupants and installers.
What the EPA Says
The U.S. Environmental Protection Agency has identified several potential exposure routes during and after spray foam application. During spraying, isocyanate vapors and aerosols are generated. These can cause skin, eye, and respiratory irritation and are known sensitizers that can trigger asthma in previously healthy individuals.
Cutting or trimming foam before it is fully cured can release dust containing unreacted isocyanates. The EPA also warns that heat-generating processes such as drilling, welding, soldering, or grinding on or near cured foam can generate airborne degradation chemicals including isocyanates, carbon monoxide, and hydrogen cyanide.
Curing and Off-Gassing
Once spray foam has cured completely, it is considered relatively inert. However, the curing process is not instant, and curing rates vary based on product formulation, foam thickness, temperature, humidity, and applicator technique. The EPA has noted that the potential for off-gassing of volatile chemicals from spray foam is not fully understood and remains an area of ongoing research.
As reported by BuildingGreen, the EPA, along with NIOSH, OSHA, and the Consumer Product Safety Commission, have all been examining the health effects of site-applied spray foam. The publication noted that no cause-and-effect relationship has yet been established between properly installed and cured SPF and long-term occupant illness, but that the investigation continues.
For a broader perspective on the regulatory scrutiny surrounding these materials, the report from BuildingGreen – EPA Raises Health Concerns with Spray Foam Insulation details the involvement of multiple federal agencies in evaluating SPF safety.
Ventilation in Tight Homes
One of the most important considerations with spray foam insulation is what happens after it is installed. Because spray foam creates such an effective air seal, it significantly reduces the natural air exchange rate of your home. This means that pollutants, moisture, and emissions from other sources (cooking, cleaning products, combustion appliances) can build up if mechanical ventilation is not added.
The DOE Insulation Fact Sheet points out that when natural ventilation is sharply reduced, fresh air ventilation may be necessary to avoid buildup of stale air and indoor air pollutants. Heat-recovery ventilators (HRVs) or energy-recovery ventilators (ERVs) are recommended for tight homes to provide controlled fresh air while recovering energy from the outgoing airstream.
Expert Tip: If you are adding spray foam to an existing home, have a mechanical contractor evaluate whether your current HVAC system can provide adequate fresh air ventilation for the tighter building envelope. In many cases, adding an HRV or ERV is not just recommended but necessary for healthy indoor air quality after spray foam is installed.
Climate Zone Considerations and Code Requirements
Spray foam requirements are not one-size-fits-all. The International Energy Conservation Code (IECC) and International Residential Code (IRC) prescribe different minimum R-values and vapor control requirements depending on your climate zone. Understanding these requirements helps ensure your insulation meets code and performs as expected.
IECC Climate Zones and Foam Selection
The Building Science Corporation’s guide provides clear direction on foam type by climate zone:
- Climate Zones 1 through 4: Both open-cell and closed-cell spray foam work in wall and roof assemblies.
- Climate Zones 5 through 8: High-density closed-cell spray foam is recommended for walls and required for unvented conditioned attics sprayed directly on the roof deck. Closed-cell spray foam at 1.5 inches or greater provides the condensation control needed in these colder climates and qualifies as a Class II vapor retarder.
R-Value Requirements by Zone
The ENERGY STAR Insulation Fact Sheet provides R-value recommendations based on eight U.S. climate zones. While the specific values depend on whether you are building new or adding to existing insulation, here are general guidelines for ceiling/attic insulation:
A comprehensive breakdown of these recommendations can be found in the ENERGY STAR – Insulation Fact Sheet, which helps homeowners determine the correct thermal targets for their specific region.
| Climate Zone | Attic Floor (Existing Insulation) | Attic Floor (Uninsulated) | Wall Cavity (Wood Frame) |
|---|---|---|---|
| 1 | R30 to R49 | R30 | N/A |
| 2 to 3 | R30 to R60 | R25 to R38 | R13 to R25 |
| 4 | R38 to R60 | R38 | R25 to R30 |
| 5 to 8 | R49 to R60 | R38 to R49 | R25 to R30+ |
Your specific zone depends on your geographic location. A certified insulation contractor or energy auditor can determine your zone and the appropriate R-value targets for each area of your home.
Expert Tip: Always check your local building code requirements before proceeding with any insulation project. Local jurisdictions may adopt specific editions of the IECC/IRC and may have amendments that differ from the base code. Your insulation contractor should be familiar with local requirements.
Energy Savings and Long-Term Value
The financial case for spray foam insulation rests on two things: the energy savings it delivers over time and the durability of the product itself.
How Much Can You Save?
According to the U.S. Department of Energy, you can save up to 20% on your home’s heating and cooling costs by adding insulation to attics, floors, crawlspaces, and accessible basement rim joists, and by reducing unwanted air leaks. The EPA’s ENERGY STAR program estimates that as much as 40% of a building’s energy is lost due to air infiltration, which is precisely the problem spray foam is designed to solve.
When spray foam is used to create a continuous air barrier, the reduction in air leakage can be substantial. The energy savings are most dramatic in homes with significant air leakage problems, older homes with little to no existing insulation, and homes in extreme climates where heating and cooling loads are high.
Long-Term Performance
Unlike fiberglass or cellulose, which can settle, sag, or degrade over time, spray foam adheres permanently to the surfaces it is applied to. It does not settle, and it maintains its R-value over the life of the product. Because it also serves as an air barrier, it does not rely on separate sealants that can fail over time.
The combination of high R-value per inch, permanent adhesion, and integrated air sealing means that spray foam insulation continues performing at its initial level for decades without the maintenance or replacement that some other insulation types may require.
Beyond Energy Savings
Spray foam insulation provides benefits that go beyond monthly utility bills:
- Improved indoor comfort by eliminating drafts and maintaining consistent temperatures throughout the home
- Better moisture management that reduces the risk of condensation, mold, and wood rot
- Structural reinforcement when closed-cell foam is used, adding rigidity to walls and roof assemblies
- Sound dampening, particularly with open-cell foam, which can reduce noise transmission between rooms and from outside
Common Mistakes and How to Avoid Them
Over our years of installing spray foam insulation, we have seen the same mistakes repeated by homeowners and inexperienced installers alike. Knowing what can go wrong helps you avoid problems and get the full benefit from your investment.
1. Choosing the Wrong Foam Type for the Application
Using open-cell foam in a below-grade crawlspace or basement is one of the most consequential errors. Open-cell foam absorbs water, and in below-grade or high-humidity environments, that absorbed moisture can lead to mold, rot, and insulation failure. Always match the foam type to the moisture conditions of the application area.
2. Ignoring Ventilation Needs After Sealing the Home
When spray foam dramatically reduces air leakage, it also reduces the natural ventilation your home relied on, even if unintentionally. Failing to add mechanical ventilation after tightening the envelope can lead to moisture buildup, stale air, and elevated pollutant concentrations. Every tight home needs a ventilation strategy.
3. Applying to Wet, Dirty, or Contaminated Surfaces
Spray foam adheres best to clean, dry substrates. Applying foam over existing wet insulation, moldy surfaces, or dirty wood can trap moisture against the building assembly and create conditions for rot and mold growth. Always remediate moisture and mold problems before insulating.
4. Spraying Without Proper Isolation
If spray foam is being applied in one area of an occupied home, the work area must be properly isolated from the rest of the living space with polyethylene sheeting and the area must be ventilated. Failure to isolate the work area can allow isocyanate-containing vapors to migrate to other parts of the building.
5. Re-Entering Too Early
Occupying a home before the foam has fully cured is a serious health risk. Follow manufacturer-recommended re-occupancy times without exception. If the curing conditions were not ideal (low temperatures, high humidity), extend the re-occupancy time accordingly.
Expert Tip: Before hiring any spray foam installer, ask them about their quality control and assurance procedures. A reputable installer will be able to explain their process for monitoring chemical ratios, substrate temperatures, and curing conditions. If they dismiss these concerns or seem uninformed about them, look for another installer.
Putting Your Residential Spray Foam Insulation Strategy into Action
Spray foam insulation is one of the most capable building materials available for improving your home’s energy efficiency, comfort, and durability. Its ability to insulate and air-seal simultaneously sets it apart from every other insulation type, and when matched to the right application and climate zone, it can transform the performance of your home’s building envelope.
The key points to carry forward from this guide are straightforward. Choose the right foam type for your climate and application area. Work only with experienced installers who follow proper safety and quality control procedures. Plan for mechanical ventilation after sealing your home. And always address existing moisture problems before insulating, not after.
We encourage you to bookmark this guide and return to it as you work through the decision-making process for your home. Whether you are building new, retrofitting, or upgrading specific areas, the principles covered here apply to every residential spray foam project.
Need Expert Guidance?
If you are ready to explore spray foam insulation for your home and want professional guidance tailored to your specific situation, we are here to help. Prestige Insulation Solutions LLC offers consultations to help you understand your options, assess your home’s needs, and plan the right approach for your climate and budget. You can reach us at [email protected] or call us at (850) 429-4969 to get started.
Frequently Asked Questions About Residential Spray Foam Insulation
Can spray foam insulation be installed in existing homes with finished walls?
In most cases, spray foam cannot be applied inside finished wall cavities without removing the drywall first. However, it can be used effectively in attics, crawlspaces, basements, and rim joist areas of existing homes without disturbing finished surfaces.
Is spray foam insulation safe once it has fully cured?
According to the EPA, properly applied and fully cured spray foam is considered relatively inert. The primary risks occur during and immediately after application, before the chemical reaction is complete.
How long does spray foam take to cure?
Curing times vary based on foam type, thickness, temperature, and humidity. Most manufacturers recommend 24 hours for re-occupancy with professional two-component systems, though some conditions may require longer. Always follow the specific product manufacturer’s guidance.
Do I need mechanical ventilation if I install spray foam?
Yes, in most cases. Because spray foam significantly reduces air leakage, it also reduces natural air exchange. The Department of Energy recommends fresh air ventilation systems such as heat-recovery ventilators or energy-recovery ventilators for homes with reduced natural ventilation.
Which is better for my attic, open-cell or closed-cell?
For unvented conditioned attics, both types work in warm to mixed climates (Zones 1 through 4). In colder climates (Zones 5 through 8), only closed-cell spray foam should be applied directly to the roof deck due to condensation control requirements.
Can spray foam insulation cause moisture problems?
When correctly installed, spray foam actually prevents moisture problems by serving as an air and vapor control layer. However, incorrect foam type selection, application over wet surfaces, or failure to provide ventilation in a tightened home can all contribute to moisture issues.
Sources
- EPA – Potential Chemical Exposures From Spray Polyurethane Foam – Official EPA guidance on chemical exposure routes, curing times, and safety considerations for spray polyurethane foam insulation
- Building Science Corporation – GM-2102: Residential Spray Foam Guide – Comprehensive technical guide on using spray foam in walls, roofs, and foundations with climate zone recommendations
- U.S. Department of Energy – Guide to Home Insulation – DOE resource covering insulation types, R-values, energy savings potential, and climate zone recommendations
- ENERGY STAR – Insulation Fact Sheet – Detailed fact sheet with R-value recommendations by climate zone, insulation cost comparisons, and retrofit guidance
- BuildingGreen – EPA Raises Health Concerns with Spray Foam Insulation – Journalism coverage of federal agency scrutiny of SPF health and safety, including EPA, NIOSH, OSHA, and CPSC involvement

- Everything You Need to Know About Professional Insulation Removal - October 7, 2026
- Which Insulation Upgrades Deliver the Best Long-Term Value in Bagdad, FL? - September 14, 2026
- How Does Blown-In Insulation in Gonzalez, FL Fill Gaps Better Than Traditional Materials? - September 14, 2026